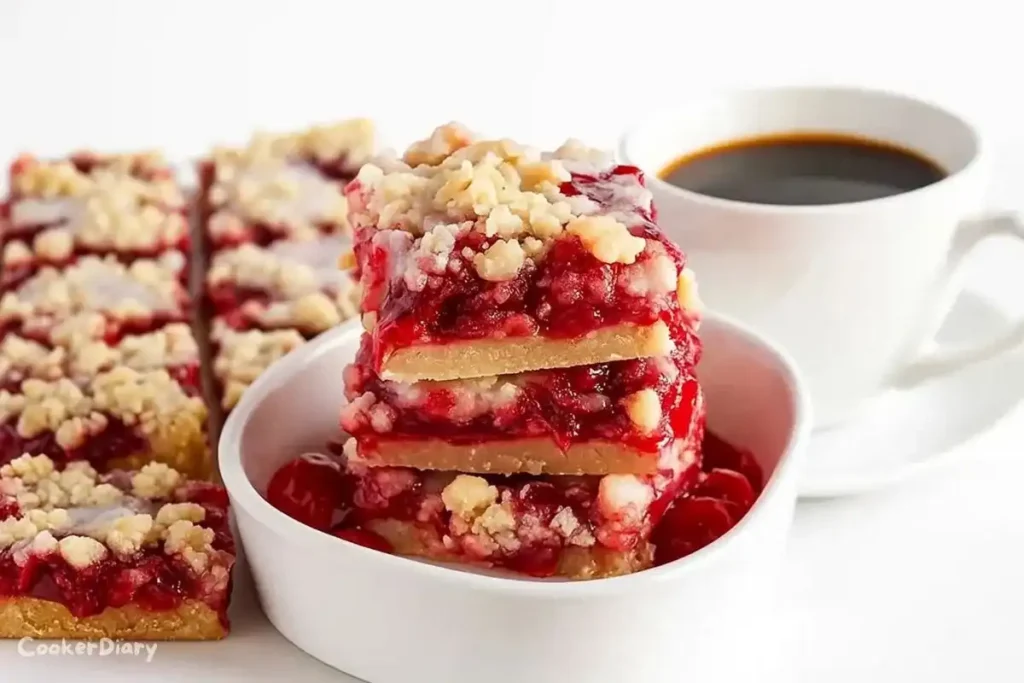
Easy Cherry Bars Recipe
There’s something truly comforting about cherry bars. The bright, sweet-tart flavor of cherries layered over a buttery crust brings back memories of family gatherings, holiday bake sales, and cozy afternoons with a cup of coffee. I remember my grandmother’s kitchen always smelled like cherries and vanilla when she made these. They were gone within hours, barely having time to cool before eager hands reached for another square. That warm, nostalgic experience is exactly what this easy cherry bars recipe delivers. Whether you’re baking for a potluck or just for yourself, these bars are a sweet reminder of simple, joyful baking.
Related: Philadelphia Cheesecake Bars Recipe
Why You’ll Love These Easy Cherry Bars
If you’re still on the fence about trying this recipe, let me give you a few reasons why these easy cherry bars should be your next baking project.
- They are quick and straightforward to make, with no fancy techniques required.
- The blend of a soft, buttery crust with a rich, juicy cherry filling makes for a dessert that’s perfectly balanced in both flavor and texture.
- You can use fresh, frozen, or even canned cherries, so there’s no excuse not to whip these up year-round.
- They slice beautifully, making them ideal for sharing at parties or adding to your holiday cookie tray.
These bars truly deliver a homemade, bakery-style treat without the stress.
Easy Cherry Bars Recipe
Recipe at a Glance
| Prep Time | Cook Time | Total Time | Servings | Cuisine | Difficulty |
|---|---|---|---|---|---|
| 15 min | 35 min | 50 min | 12 bars | American | Easy |
Related: No-Bake Buckeye Cheesecake Bars
Equipment
To keep things simple, you’ll only need a few basic kitchen tools:
For me, these tools are always ready on my counter when I bake, and they’re more than enough to make these cherry bars a success.
Recipe Ingredients
| Ingredient | Amount | Notes |
|---|---|---|
| All-purpose flour | 2 ½ cups | Sifted |
| Granulated sugar | 1 ½ cups | |
| Salt | ½ teaspoon | |
| Baking powder | 1 teaspoon | |
| Unsalted butter | 1 cup (softened) | |
| Eggs | 4 | Large |
| Vanilla extract | 1 teaspoon | Pure |
| Cherry pie filling | 1 can (21 oz) | Or homemade cherry preserves |
| Almond extract | ½ teaspoon | Optional, enhances flavor |
Related: Cheesecake Bars Recipe with a Chocolate Swirl
Ingredients Tips & Substitutes
- You can swap out almond extract if you have nut allergies, using more vanilla instead.
- If you prefer a fresher flavor, cook fresh or frozen cherries with sugar and cornstarch until thickened rather than using canned filling.
- Gluten-free all-purpose blends also work surprisingly well in this recipe.
Recipe Instructions
- Set your oven to 350°F (175°C) and line a 9×13 baking pan with parchment paper to make cleanup simple.
- In a mixing bowl, combine the flour, baking powder, and salt by whisking them together. Set aside.
- With an electric mixer, beat the butter and sugar together until the mixture is light and fluffy.
- Add the eggs individually, mixing thoroughly after each one goes in. Stir in the vanilla and optional almond extract.
- Slowly incorporate the dry ingredients, stirring only until everything is blended. The batter will be thick.
- Evenly spread roughly two-thirds of the batter into the lined baking pan.
- Carefully spread the cherry pie filling evenly over the batter. If you’re using homemade cherry preserves, spread it gently with the back of a spoon.
- Drop spoonfuls of the leftover batter over the cherries, allowing some of the filling to show through.
- Bake for 35 to 40 minutes, until the top turns golden and a toothpick inserted comes out mostly clean.
- Cool completely on a wire rack before cutting into squares.
These bars always remind me of summer bake sales when everyone grabbed two or three to take home. They’re classic, portable, and guaranteed to make you a baking hero.
Chef’s Tips and Variations
If you’d like to experiment, there are several easy ways to adapt this recipe:
- Chill the bars before slicing for cleaner, bakery-quality edges.
- Drizzle a simple glaze of powdered sugar and milk over the cooled bars for extra sweetness.
- Sprinkle sliced almonds on top before baking for a bit of crunch and an elegant look.
- Replace cherry filling with blueberry or raspberry preserves if you want to change up the flavor.
Therefore, you have endless options with this base recipe, so don’t be afraid to get creative.
Nutrition Information
| Serving Size | Calories | Carbs | Protein | Fat | Fiber | Sugar |
|---|---|---|---|---|---|---|
| 1 bar | 230 | 35g | 3g | 9g | 1g | 20g |
Related: Homemade Strawberry Brownies in Just 30 Minutes
Nutrition values are approximate and may vary depending on the exact brands and measurements you use.
FAQs About Cherry Bars
Can I make cherry bars ahead of time?
Yes, you can. Cherry bars keep well in an airtight container at room temperature for up to three days. If you want to store them longer, freeze them tightly wrapped for up to three months.
Are cherry bars the same as cherry pie bars?
They are quite similar. Both feature a shortbread-style crust with cherry filling and often a crumb or lattice-style topping. The terms are often used interchangeably.
Can I use fresh cherries instead of canned cherry filling in cherry bars recipe?
Absolutely. Fresh cherries work great. Simply pit and roughly chop them, then cook with sugar and a spoonful of cornstarch until the mixture is thickened. Let it cool before layering it into the batter.
Final Thoughts on These Cherry Bars
Cherry bars are one of those timeless desserts that never go out of style. Also, they are easy to make, easy to share, and so satisfying. Whether you serve them at a summer picnic or as a cozy winter treat, they always deliver a taste of nostalgia with a touch of modern simplicity. I’d love to hear how you made this recipe your own — feel free to leave a comment with your creative twists or tag me if you share a picture. Happy baking!
Disclaimer: CookerDiary provides approximate nutritional information for recipes. Actual values may vary depending on brands, measuring methods, or specific ingredients used. As an Amazon Associate, CookerDiary earns from qualifying purchases, at no additional cost to you.